In order to start using Cliargs.NET successfully, there are some steps to follow, In this quick startup, we try to build a sample console application that displays the user name, the age and highlight the output on demand. The name is mandatory argument, while the age is not. the user has the possiblity to choose to highlight the console output or not, using the option --highlight.
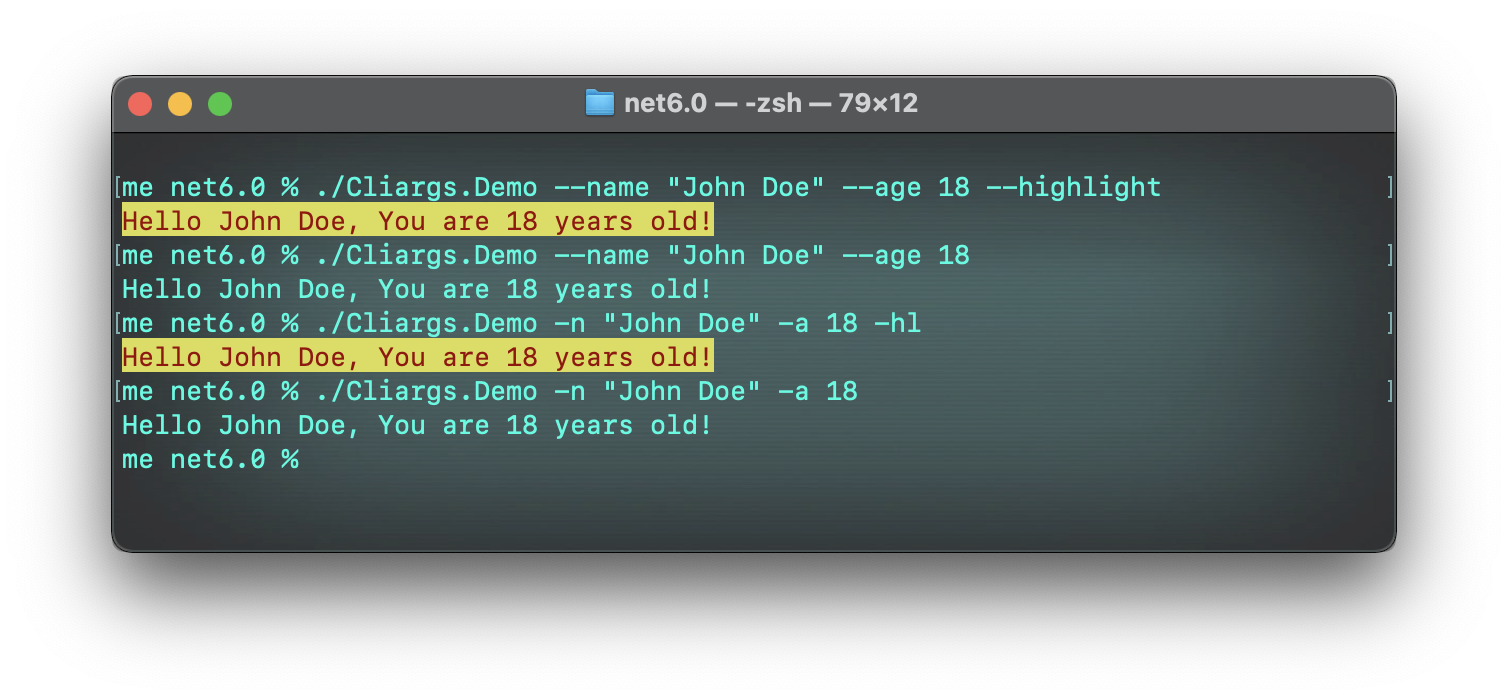
The full example could be found on Github repository
1. Create a Setup class
The Setup class is the main class hosting the configuration of the Cliargs.NET, this class must have the method Configure implemented. All arguments must be declared in this method, so Cliargs will know exactly what arguments to look for, the type of each argument, the category (Required, optional…). Also for each argument there are a set of other options to be set during the argument initialization.
1
2
3
4
5
6
7
8
9
10
11
12
13
14
15
16
17
18
19
20
21
22
23
24
25
26
27
28
29
30
31
32
33
34
35
public class CliArgsSetup : ICliArgsSetup
{
    public void Configure(ICliArgsContainer container)
    {
        // The user real name
        container.Register(
            CliArg.New<string>("Name")
            .AsRequired()
            .WithLongName("name")
            .WithShortName("n")
            .WithDescription("The user real name")
            .WithUsage($"-n|--name \"John Doe\"")
        );

        // The user real age
        container.Register(
            CliArg.New<uint>("Age")
            .AsOptional()
            .WithLongName("age")
            .WithShortName("a")
            .WithDescription("The user age in years")
            .WithUsage("-a|--age 28")
        );

        // Option to highlight the output
        container.Register(
            CliArg.New("Highlight")
            .AsOptional()
            .WithLongName("highlight")
            .WithShortName("hl")
            .WithDescription("Highlight the output in color")
            .WithUsage("-hl|--highlight")
        );
    }
}
2. Initialize the AppCliArgs instance
The AppCliArgs is the main instance that host the CLI arguments with their values. It also analyze, parse and validate the data entered by the user.
During the initialization process some exceptions may be thrown in case of missing non-optional arguments, or when a wrong value has been typed.
1
2
3
4
5
6
7
try {
    AppCliArgs.Initialize<CliArgsSetup>(new CustomFormat());
}
catch(CliArgsException exception){
    Console.WriteLine($"Error: {exception.Message}");
    return;
}
3. Manage Exceptions
Currently, there are some known exceptions that might be handled after the initialization, such us checking if the user request to see the help section, or if there were a validation errors on the user input. Other kind of exceptions might be a thrown CliArgsException, in this case, a clear message is set, or even, an inner exception is attached to the thrown exception.
1
2
3
4
5
6
7
8
9
10
11
12
13
14
15
if(AppCliArgs.IsHelpRequested())
{
    Console.WriteLine(AppCliArgs.GetHelpString());
    return;
}

if(AppCliArgs.HasValidationErrors)
{
    var validationResults = AppCliArgs.GetValidationResults();
    foreach (var result in validationResults)
    {
        Console.WriteLine(result.GetReport());
    }
    return;
}
4. Start using the command line interface arguments values
Once the initialization and exceptions management are completed, you can start retrieving the values using the AppCliArgs.GetValue Method. All the required arguments should be there, except the optional arguments, where a quick check for existence is recommended using the method AppCliArgs.IsSet.
1
2
3
4
5
6
7
8
9
10
11
12
13
14
15
16
17
18
19
var name = AppCliArgs.GetArgValue<string>("Name");
uint? age = null;
bool highlight = AppCliArgs.IsSet("Highlight");

string output = $"Hello {name}, we don't know your age!";

if(AppCliArgs.IsSet("Age")) {
    age = AppCliArgs.GetArgValue<uint>("Age");
    output = $"Hello {name}, You are {age} years old!";
}

if(highlight) {
    Console.BackgroundColor = ConsoleColor.Yellow;
    Console.ForegroundColor = ConsoleColor.DarkRed;
}
Console.WriteLine(output);
if(highlight)
    Console.ResetColor();